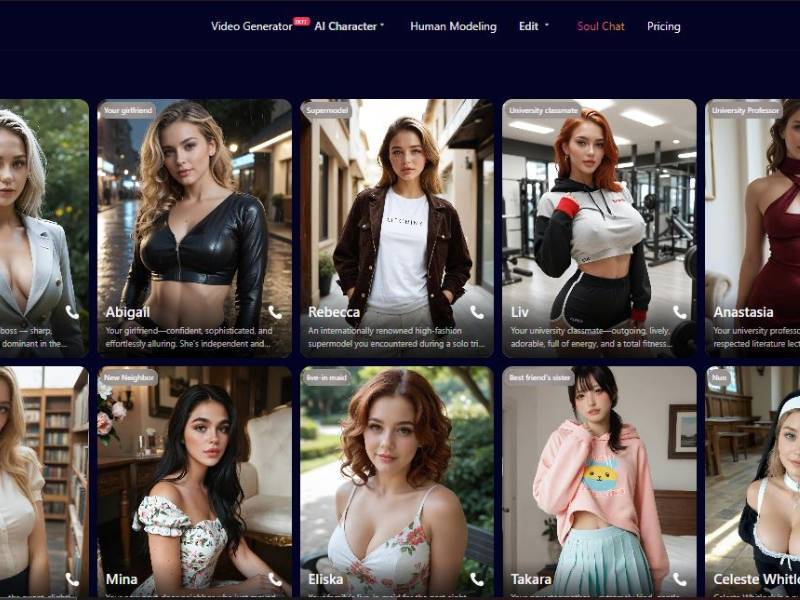
You land on the page and it’s straight-forward: an AI character generator where you can enter text, and then receive images of said characters that were based on that input.
In the category that you summoned, namely AI Girl, you have options like DreamTwin Girl, Visionary Girl and SoulGirl Plus – and these are only styles that you choose before generating any sort of character.
This isn’t an empty canvas piled high with buttons and jargon; it feels like a tool aimed at people who want to dream up characters, not program them.
Soulgen AI Hentai Generator: Detailed user guide
Step 1 – Open the right generator: AI Character → Anime Character

At the very top navigation bar, you’ll see AI Character highlighted (it sits alongside other tools like Video Generator, 3D Modeling, Edit, Face Swap, Soul Chat, Pricing). In your screenshot, clicking AI Character opens a small dropdown with three options:
- Real Character
- DreamTwin Character
- Anime Character
Choose Anime Character.
Why this matters: if you’re aiming for anime styling, starting in the Anime Character mode helps the generator lean into anime traits (linework, face proportions, shading style) rather than realistic portrait cues.
Step 2 – Write your prompt in the “Enter prompt” box

Once Anime Character is selected, you land on a page with three mode tabs near the top:
- Real Character (tab)
- DreamTwin Character (tab)
- Anime Character (tab) – this one is selected in your image and has an orange outline
Each tab has a question mark icon (?) beside it, which is typically a quick help/tooltip area.
Under that is a big field labeled Enter prompt with a placeholder like “Enter description”.
What you can do in the prompt area (from the UI shown)
- Type or paste a description (your example prompt is already filled in one screenshot).
- There’s a small “X” on the right side of the prompt box (clear/reset the text).
- There’s a character counter on the right (your screenshot shows 639), so you can tell how long the prompt is.
- There’s a History button under the prompt area, which is useful when you want to reuse prompts or iterate fast.
Prompt writing that actually works (without getting overly technical)
A solid anime character prompt usually includes:
- Vibe/attitude (shy, confident, mysterious, playful)
- Core look (hair, eyes, outfit)
- Art cues (soft lighting, high detail, clean linework)
- Pose/composition (portrait, full body, dynamic angle)
- Mood/background (cozy room, neon city, sunset, minimal background)
Example prompt format (easy to copy)
| Prompt Part | Example |
| Character | “anime girl, confident but gentle” |
| Face & hair | “glossy eyes, long dark hair, neat bangs” |
| Outfit | “stylish streetwear outfit” |
| Style cues | “high detail illustration, clean linework, soft lighting” |
| Scene | “cozy romantic atmosphere, subtle background blur” |
If your results feel “meh,” the fix is usually not “more words,” it’s more specific words.
Step 3 – Choose a style preset (Cartoon / Classic / Real Anime)
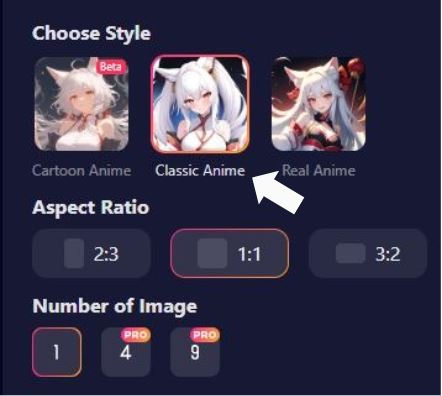
Scroll a bit and you’ll see Choose Style with three square preview tiles:
- Cartoon Anime (has a small Beta tag)
- Classic Anime
- Real Anime
When you click one, it gets a highlighted border (your screenshots show Classic Anime selected).
How to pick the right style
| Style | Best for | What it tends to look like |
| Cartoon Anime (Beta) | cute, simplified characters | bolder shapes, less realism, “toon” vibes |
| Classic Anime | traditional anime aesthetics | clean anime proportions, familiar shading |
| Real Anime | more detailed, semi-real anime | sharper detail, more texture, “premium poster” feel |
If you’re not sure: pick Classic Anime first. It’s the “safe bet” baseline.
Step 4 – Pick an aspect ratio (2:3 / 1:1 / 3:2)
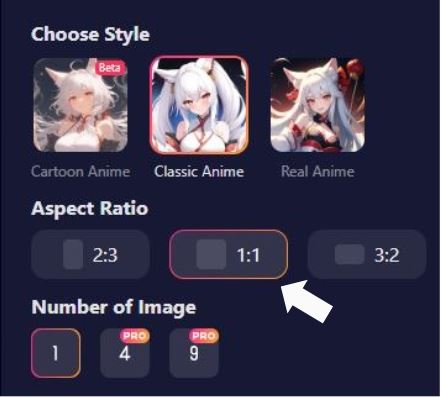
Next section: Aspect Ratio with three buttons:
- 2:3
- 1:1
- 3:2
Your screenshot highlights 1:1 (square).
Aspect ratio cheat sheet
| Ratio | Best use | Quick description |
| 2:3 | full-body character, “poster” framing | taller canvas |
| 1:1 | profile pics, icons, centered portraits | square canvas |
| 3:2 | wider scenes, character + background | landscape-ish canvas |
If you want a clean character portrait you can reuse anywhere, 1:1 is the easiest win.
Step 5 – Decide how many images to generate (1 / 4 / 9)
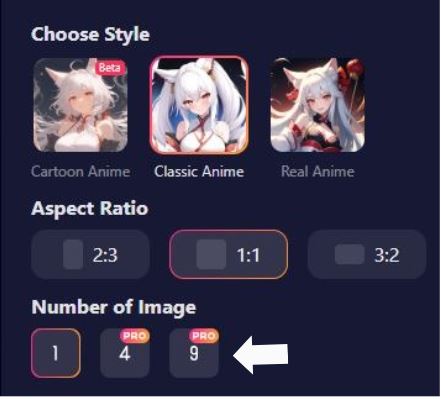
Under that you’ll see Number of Image with three options:
- 1
- 4 (PRO)
- 9 (PRO)
So:
- 1 is the standard “one result” option.
- 4 and 9 are marked PRO, meaning they’re likely paid/upgrade options.
How many should you choose?
| Option | When to use it | Why it helps |
| 1 | you’re testing a new prompt | cheaper, faster iteration |
| 4 (PRO) | you have a good prompt | gives variety without overload |
| 9 (PRO) | you’re hunting the “perfect” result | maximum variation in one go |
Real talk: generating more images is basically paying for better odds. Same prompt, multiple interpretations.
Step 6 – Hit “Create” (and watch your credits)
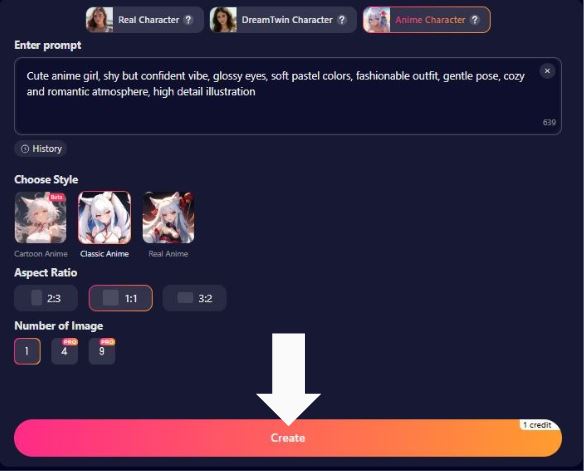
At the bottom is a big, colorful gradient button labeled Create.
On the right side of that button, there’s a small label that shows the cost: your screenshot shows “1 credit”.
So the final step is simple:
- Double-check your prompt
- Confirm style + ratio + number of images
- Click Create
- The generator uses the listed credits and produces your anime character image(s)
What You Can Actually Do (Plain Language)
| Feature | What It Means in Real Terms |
| Text Prompt Input | You describe (in words) the character you want – e.g., hairstyle, outfit, vibe, personality hint – and the AI tries to generate matching art. |
| Style Presets | Pick among presets like Visionary Girl or DreamTwin Girl. These are like ready-made art styles that change the look. |
| Aspect Ratios | You choose the shape of the image – tall, square, wide – so it fits whatever you’re planning. |
| Image Count | Decide how many variants you want in one batch before you hit “Create.” |
It’s basically a text-to-image generator fine-tuned for stylized characters (especially anime-inspired).
But What About Personality?
Some AI tools separate static images from AI chat personalities. In SoulGen’s ecosystem there’s a related feature for creating AI characters you can chat with (like a virtual companion), but that’s a different module – usually branded as SoulGen AI Chat – and it’s not part of just the image creation page you pointed to.
So if you expected an interactive “AI girlfriend” that talks back like a chatbot, that’s a separate piece of the platform.
What You Should Know Before Jumping In
People who’ve used or discussed this tool online note a few important points:
- The quality of results depends a lot on how good your prompt is – vague descriptions get vague images. Think of prompting as co-authoring with the AI.
- There used to be more leeway in generating certain styles, but recent changes mean the tool filters or restricts some prompt types. That’s to keep things on the right side of platform safety policies.
- If you want customization beyond the basics, practice writing prompts that describe appearance, lighting, mood, and props. The AI only knows what it can infer from text.
Why People Like It (and Why They Don’t)
Here’s my honest take, in conversational form:
Some folks genuinely dig this because it’s one of the more user-friendly character creators out there – you basically type what you imagine and it tries to make that image real. That instant feedback loop is addictive in a creative sort of way.
On the flip side, if your goal is very specific content or something that pushes boundaries, you might get frustrated fast.
Everyone’s taste is different – and the same AI that’s “creative” to one person can feel “generic” to another.
Is It Worth Trying?
If you’re into:
- Creating custom character art from text
- Designing stylized anime-inspired visuals
- Playing with prompts and seeing unexpected results
then SoulGen’s AI Girl generator is absolutely worth a spin. Even if you’re not artistically inclined, it’s a playground for ideas and visual experimentation.
It doesn’t take long before you’re asking yourself – “What if she had silver-blue eyes and that bold attitude?” and seeing what the AI does with it.
That kind of loop – prompt, generate, tweak – can be genuinely fun.
Quick Tips to Get Better Results
| Prompting Tip | What It Does |
| Be descriptive | The AI has more cues to work with; simple “girl” isn’t enough. |
| Add style hints | Words like “soft lighting”, “anime portrait”, “dramatic pose” help guide aesthetics. |
| Try multiple styles | Compare DreamTwin vs Visionary to see which vibe matches your idea. |
Think about it like remixing an idea – the more you play with wording, the closer the images get to what’s in your head.
Bottom Line
SoulGen’s AI Girl page is a legitimate tool for generating smooth, polished character images from text descriptions.
It’s easy enough to pick up, yet powerful enough that you could spend a whole day playing with one of the ideas it suggests, and won’t require you to have any knowledge of art software.
If you enjoy visualizing your characters and just want a visual(ish) way to bring them to life, it’s certainly worth trying.