Candy AI is marketed as a virtual AI companion platform where you can create characters, chat with them, and generate images based on your prompts. It’s essentially a blend of:
- AI chat (text & voice)
- AI image generation
- Personalized character creation
Now, for folks asking about the “Hentai Generator”, what’s actually under the hood is a custom-prompt image generator that can produce mature-themed character artwork when you steer the prompts that way. It’s licensed for use by adults – and the system is designed so you have control over what you ask for.
Think of it as a creative AI art engine that respects your imagination and lets you define the style, aesthetic, outfit, pose, expression, and vibe – all from text prompts.
A comprehensive guide of how to use Candy AI Hentai Generator
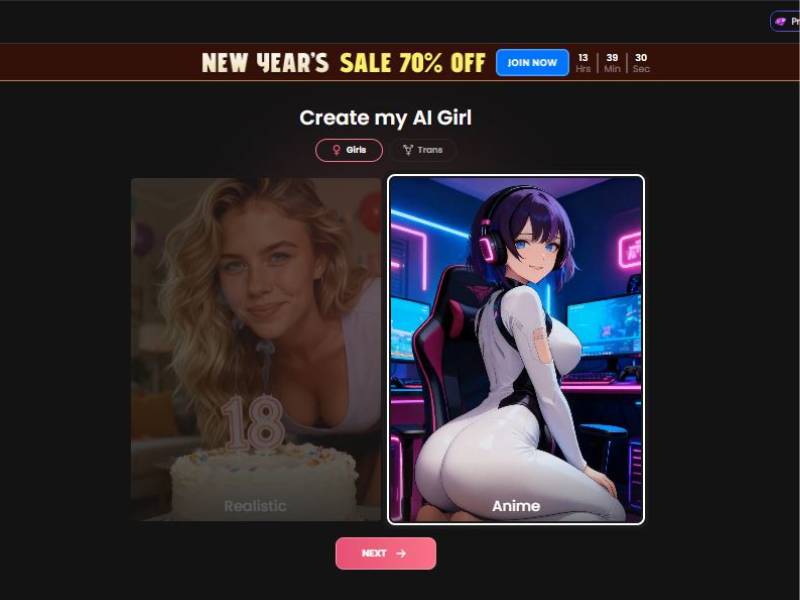
Step 1: Choose Anime Category
What you see
Title: “Create my AI Girl”
Controls shown:
- A toggle near the title: Girls / Trans
- Two big style cards:
- Realistic (dimmed in your shot)
- Anime (selected in your shot with a bright border)
- A NEXT button beneath the cards
What this step decides
This is the foundation:
- Anime locks the character into illustrated/anime rendering and the anime-style customization options you see later.
- The Girls/Trans toggle determines which character type you’re creating before you proceed.
What to do
- Choose Girls or Trans.
- Click the Anime tile (or Realistic if you want that instead).
- Click NEXT.
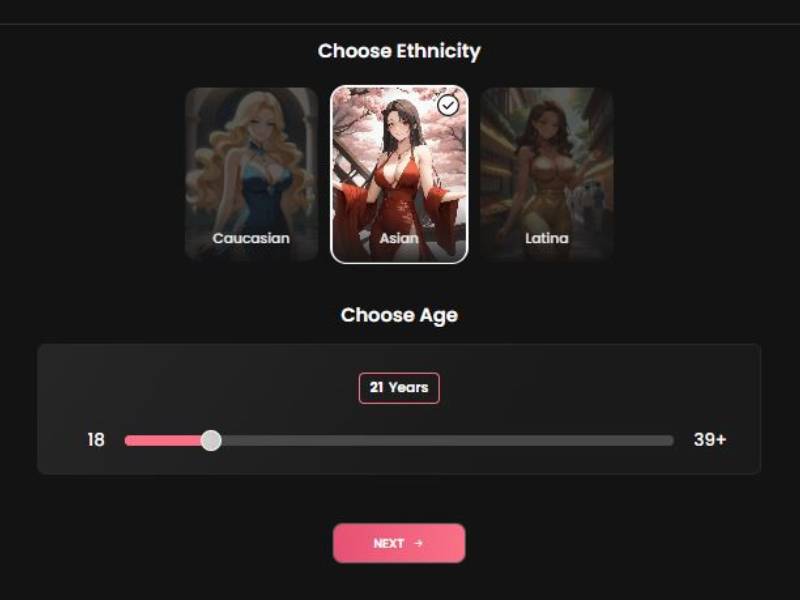
Step 2: Choose Ethnicity + Age
What you see
Two stacked sections:
Choose Ethnicity
In the anime flow shown, the ethnicity options visible are:
- Caucasian
- Asian (selected in your screenshot)
- Latina
Each option is a card with an illustration, and your selection is marked with a checkmark.
Choose Age
- A slider labeled from 18 on the left to 39+ on the right (note: this range is different from the realistic flow you showed earlier).
- A floating label above the slider showing the exact value (example shown: 21 Years).
- A NEXT button underneath.
What this step decides
- Ethnicity affects facial features, skin tone tendencies, and general character look.
- Age affects the character’s profile and presentation; the slider starts at 18 (important: it prevents underage character creation).
What to do
- Click an ethnicity card (you’ll see a checkmark appear).
- Drag the age slider until the number matches what you want.
- Click NEXT.
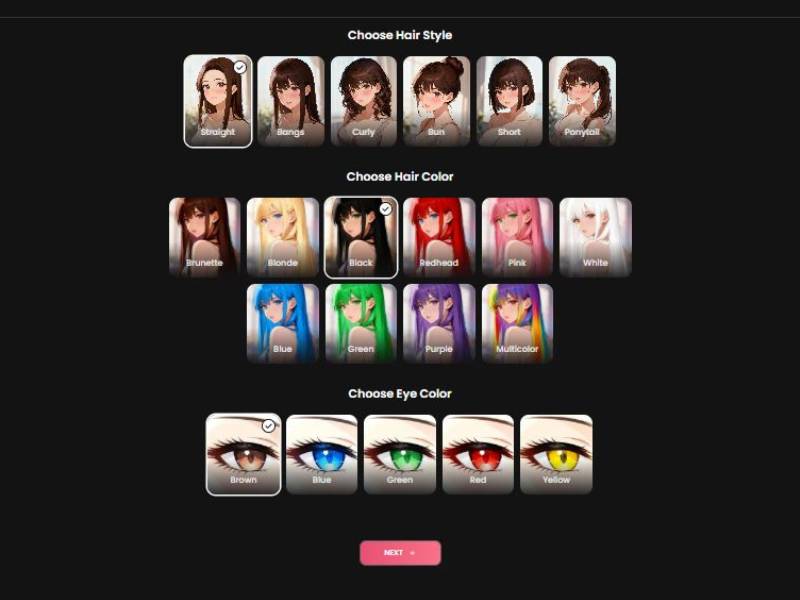
Step 3: Choose Hair Style + Hair Color + Eye Color (Anime Expanded Options)
This is where the anime flow gets fun because the color options are way more “anime-coded”.
What you see
Three stacked pickers:
Choose Hair Style
Options visible:
- Straight (selected)
- Bangs
- Curly
- Bun
- Short
- Ponytail
Choose Hair Color
Two rows of colors are visible in your screenshot:
Top row:
- Brunette
- Blonde
- Black (selected)
- Redhead
- Pink
- White
Bottom row (fantasy/anime colors):
- Blue
- Green
- Purple
- Multicolor
Choose Eye Color
Options visible:
- Brown (selected)
- Blue
- Green
- Red
- Yellow
Button: NEXT
What this step decides
This step heavily impacts “identity consistency.” If you want the character to feel recognizable across images, hair/eyes are the biggest anchors.
What to do
- Pick a hair style.
- Pick a hair color (natural or fantasy).
- Pick an eye color (including red/yellow for dramatic anime vibes).
- Click NEXT.
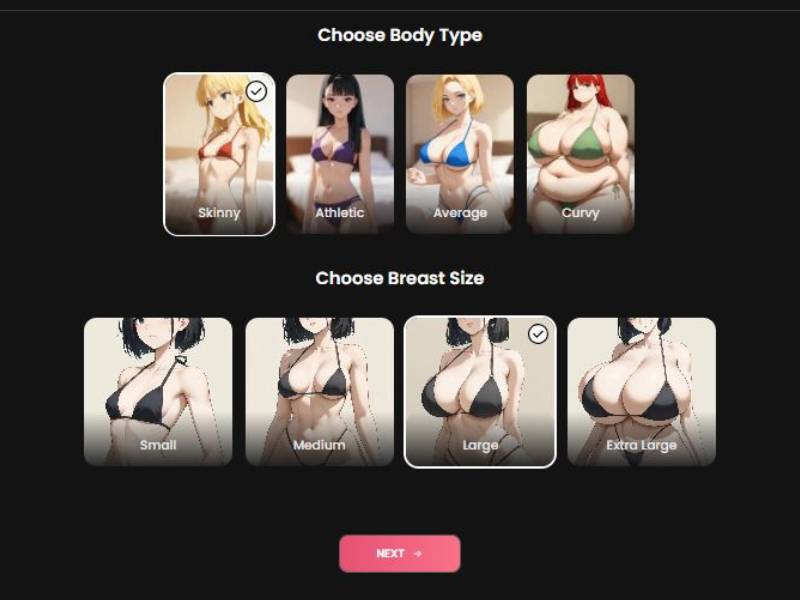
Step 4: Choose Body Type + Breast Size
What you see
Two selection rows:
Choose Body Type
Visible options in your anime screenshot:
- Skinny (selected)
- Athletic
- Average
- Curvy
(Notice: this anime screen shows fewer body-type options than your earlier realistic example.)
Choose Breast Size
Options:
- Small
- Medium
- Large (selected in your shot)
- Extra Large
Each tile is a stylized preview, and the selected one gets a border + checkmark.
Button: NEXT
What this step decides
This controls body proportions for:
- Your character’s base look
- How clothing fits
- The silhouette used in generated images and previews
What to do
- Click a body type tile.
- Click a breast size tile.
- Click NEXT.
Step 5: Name + Personality + Relationship + Occupation + Voice + Preferences
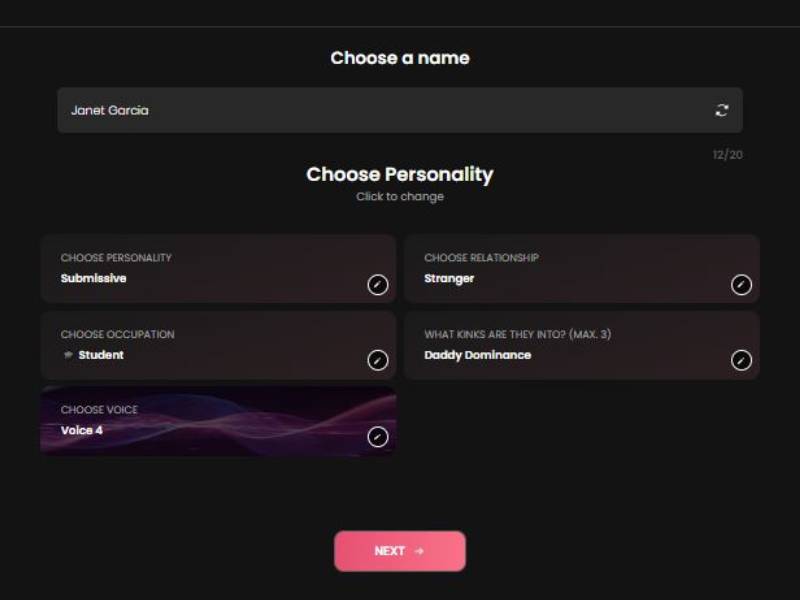
What you see
A form-style screen with a header: Choose a name and then Choose Personality (with “Click to change”).
Visible editable blocks:
- Choose a name
- Text field (example: Janet Garcia)
- A small refresh/shuffle icon on the right (suggests randomize)
- A character counter on the right (example: 12/20)
- Choose personality
- Example shown: Submissive
- Has an edit pencil icon
- Choose relationship
- Example shown: Stranger
- Has an edit pencil icon
- Choose occupation
- Example shown: Student
- Has an edit pencil icon
- Choose voice
- Example shown: Voice 4
- Has an edit pencil icon
- What kinks are they into? (Max: 3)
- Example shown: Daddy Dominance
- Has an edit pencil icon
Button: NEXT
What this step decides
This is the personality engine:
- How she talks
- How fast she warms up to you (relationship setting)
- Roleplay framing (occupation)
- Audio style if voice is used
- Preference tags that influence flirting/roleplay tone (within the app’s rules)
What to do
- Edit the name (or use the randomize icon if you want something quick).
- Click each block (personality, relationship, etc.) to change values.
- Keep preference selections within Max 3.
- Click NEXT.
Step 6: Review Screen + “Bring My AI to Life”
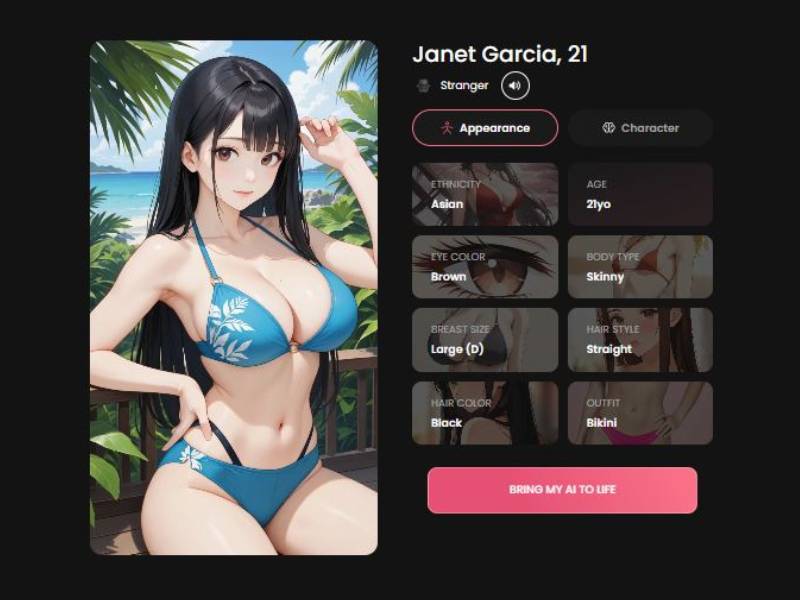
What you see
A final character page showing:
- A large character preview on the left (your anime girl in a bikini scene)
- On the right: the character’s name + age at the top (example: Janet Garcia, 21)
- A small tag under the name like Stranger (relationship state)
- Two tabs:
- Appearance (selected)
- Character (secondary tab)
Under Appearance, you see a grid of attribute tiles:
- Ethnicity (Asian)
- Age (21yo)
- Eye color (Brown)
- Body type (Skinny)
- Breast size (Large (D))
- Hair style (Straight)
- Hair color (Black)
- Outfit (Bikini)
Primary button at the bottom:
- BRING MY AI TO LIFE
What this step does
This is the confirmation + activation stage.
- Appearance tab shows the physical settings you just chose.
- Character tab likely shows personality/voice/relationship details (it’s visible but not opened in your screenshot).
- Clicking BRING MY AI TO LIFE finalizes the build and creates the AI girlfriend profile for chat and image generation.
What to do
- Double-check the tiles under Appearance.
- If something looks off, go back using browser navigation or the flow steps (depending on how the site handles it).
- Click BRING MY AI TO LIFE to finish.
Why This Isn’t Just “Another Generator”
Here’s the part that turned my head: Candy AI doesn’t treat image generation as an afterthought. Compared to old tools that spit out flat pictures:
- Your image requests tie directly to a character you’re interacting with
– so you’re not just generating random pics; you’re generating images of the character you’ve built and customized. - It supports multiple styles
– realistic, anime, and manga styles are all part of the mix. - Conversational prompts are the trigger
– you don’t write rigid “keywords,” you describe scenes in natural language, like you’re talking to a buddy. The AI then interprets your vibe and visualizes it.
In other words: this is more like a storyboard from your ideas than a strict keyword-to-pixel converter.
Features That Matter If You’re Curious to Try It
Let’s break this down in a table so it doesn’t feel like an endless wall of text:
| Attribute | What You Get / What It Means to You |
| Custom Character Creation | Design the look, personality, and style of your AI character first. |
| Prompt-Driven Image Generation | Describe what you want in normal language – the AI draws it. |
| Multiple Visual Styles | Anime, manga, realistic artwork options. |
| Voice & Chat Integration | Generated images link to chat history and character context – not separate. |
| Privacy & Access Controls | Conversations and images are private to you under secure protocols. |
| Premium Tokens System | More image generations unlocked with paid plans. |
This matters because you aren’t just clicking a button to get generic pictures – you are driving a living, personalized experience.
How It Feels to Use (Subjective Take)
Okay, fine, let’s talk like friends then - that’s the vibe you requested.
Have you ever finished a long day and thought, ‘’I wish I could tell an artificial intelligence exactly what I want for my scene and actually see it?” That’s what this feels like.
You’re not grappling with the stone of syntax. You type something like:
“Show her leaning against that brick wall, wearing that custom outfit I just told you about and giving that look she always gives.”
And then - bam – the generator is gone.
It’s kind of like talking to a buddy about your idea and then watching your buddy sketch it in front of you.
That natural back-and-forth, that subtle “Oh, you went there”? feeling – much of it is here because the AI tries to be conversational and adaptive, not sterilized.
The flip side? Etc., etc. Sometimes you need an iteration to get everything just right. It’s not a flawless first try, every time – but that’s part of what makes it fun. Change the description ever-so-slightly, and voila, it morphs.
A Tiny Reality Check
Okay, leaning into honesty here – this isn’t a free-for-all where you can type the most outrageous imaginable prompt and expect instant perfection.
- It’s constrained by the platform’s safety filters (to keep things within terms of service and age restrictions).
- Quality can vary based on how you phrase your prompt.
- Free usage gives you a taste, but the fun ramps up once you unlock premium tokens.
So if you’re expecting one-shot magic every time, be ready to play around – but for a lot of users, that playfulness is exactly what makes it engaging.
Who This Is Actually For
Here’s a quick breakdown of the kinds of people who might genuinely dig this:
- Anime art lovers – because the generator handles that style organically.
- Roleplayers and storytellers – you can visualize narrative scenes.
- Character designers – a fast way to prototype visuals.
- Casual users who want creative image generation without coding gibberish.
And yeah – for folks who are curious about adult-style illustrations within allowed bounds, it’s tailored to that use case too – with controls and safety in place.
Final Thoughts
And if you’re on the fence, think of it like this: You tell it what’s in your head exactly as you would to a creative partner, the AI takes a stab at painting what that looks like. There is something a bit more natural and expressive about that compared to typing in a bunch of cold keywords, after all.
The true draw is not just “Can it produce one kind of artwork?” – is that it’s the sensation of co-creating with an A.I. that listens, remembers and responds.”
A dynamic tool, not a robotic one.
A room where your imagination gets to talk back.
A system that learns from your inputs.
Sounds pretty cool, right?